
I remember the first time I baked an apple pie that actually made my kitchen smell like the house I grew up in. My grandmother folded crust like she had a secret tucked into her sleeves, and I watched the steam fog the window while we waited for the oven timer like it was a ticking drumbeat of something that mattered. I learned then that a homemade apple pie does more than fill a plate it stitches together a scrap of ordinary time into a small celebration. The apples soften into sweet, tender pieces, the butter browns into tiny islands of flavor, and the crust crackles when you slice it. That first pie I made here at home felt like a hand reaching back through the years.
Over the years I turned those small Sunday-baking experiments into a reliable weeknight comfort: the kind of dessert that makes friends linger, kids hop off the couch, and partners smile in a way that says “everything’s good.” I started paying attention to the little choices that change the outcome the way ice water keeps the crust flinty and crisp, how a mix of tart and sweet apples gives you layers of flavor, and how an egg wash makes a crust sing with golden color. I tested this recipe multiple times until it hit that sweet spot of simple, forgiving technique and reliably homey results.
This recipe will save you from the bakery line without making you miss the craft. You will not need special equipment beyond a rolling pin and a pie pan. You will practice a few basic hands-on steps cutting butter into flour, coaxing dough into a ball, tossing apple slices with sugar and cinnamon and you will finish with a pie that looks and tastes like comfort. The smell alone turns a regular evening into something worth remembering. Invite someone, or keep it all to yourself; either way, this apple pie gives you a reason to slow down and savor the small pleasures.
Comfort food brings people together in the simplest, truest way. A warm slice of apple pie with a scoop of vanilla ice cream turns routine into ritual and a busy day into a shared moment. If you want a dessert that says “welcome home” without fuss, this one does the work for you.
DishGrub tests every recipe in real home kitchens so the steps stay practical and the ingredients remain easy to find. We focus on simple techniques that deliver classic results, and we write for cooks who balance time with flavor. This apple pie comes from that approach: straightforward pastry that stays crisp, an apple filling that does not run, and baking directions that work in a typical oven. Follow the method, and you will get a golden, bubbling pie that earns compliments and repeats.
Why you’ll love this dish
You will love this apple pie because it balances comfort and simplicity. The crust turns flaky through cold butter and minimal handling, so you do not overwork the dough. The filling uses routine pantry staples sugar, cinnamon, and a touch of flour to thicken the apple juices without turning the pie into a stodgy pudding. Baking the pie at a high temperature at first locks in flaky layers and creates an early lift, and lowering the heat finishes the apples gently. The result gives you a sturdy slice with a tender, fruit-forward center.
This recipe also adapts to whatever apples you find at the store. Use a mix of tart and sweet varieties to get depth without adding extra sugar. The method stays forgiving for beginner bakers: chill the dough, keep the butter cold, and use a light hand when sealing the edges. You gain a timeless dessert that looks more impressive than the effort it takes.
How to prepare Homemade Apple Pie
Start with chilled ingredients and keep your workspace cool. Cold butter gives you those flaky pockets in the crust. Use a pastry cutter or two knives to work the butter into the flour until you see pea-sized crumbs. Add ice water a tablespoon at a time so the dough holds together without getting wet and sticky. After the dough rests in the fridge, roll it out gently on a floured surface and transfer it to your pie pan.
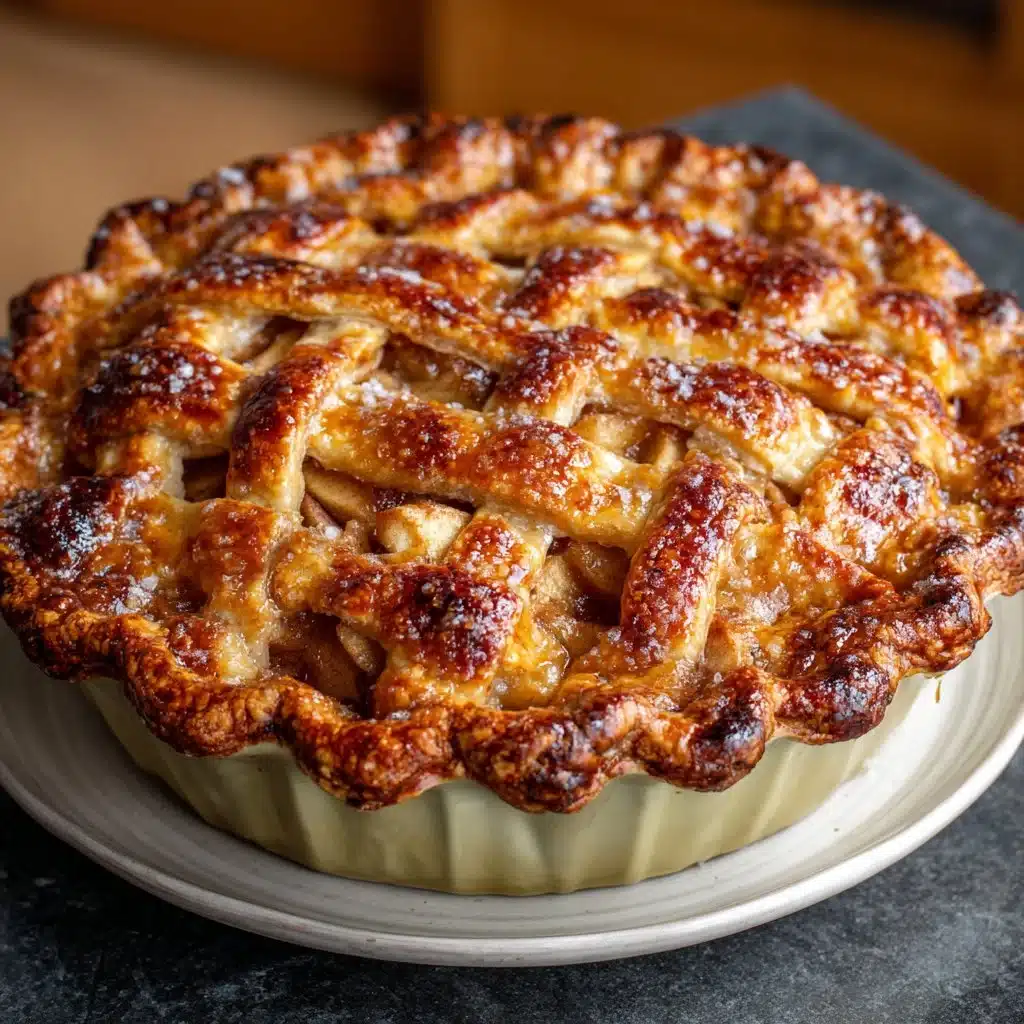
Toss your sliced apples with the sugar, flour, and cinnamon so each slice carries flavor and a little help to thicken. Dot the filling with small pieces of butter before topping the pie those butter pieces melt into flavorful pockets. Seal the edges with a light prick or decorative crimp, brush with an egg wash for color, and cut a few slits to let steam escape. Start baking hot for a golden crust, then reduce the oven heat to finish the pie through. Let the pie rest after baking so the filling firms up and slices cut cleanly.
Ingredients
- 2 1/2 cups all-purpose flour
- 1 cup unsalted butter, chilled and diced
- 1/4 cup sugar
- 1/2 teaspoon salt
- 6 to 8 tablespoons ice water
- 6 to 8 apples, peeled, cored, and sliced
- 3/4 cup sugar
- 2 tablespoons all-purpose flour
- 1 teaspoon cinnamon
- 2 tablespoons butter
- 1 egg, beaten
Instructions
-
Preheat the oven to 425°F (220°C).
-
In a bowl, mix flour, sugar, and salt. Cut in butter until the mixture resembles coarse crumbs. Stir in ice water, a tablespoon at a time, until the mixture forms a ball. Wrap in plastic and refrigerate for 4 hours or overnight.
-
Roll out pie crust on a floured surface. Place one crust in a pie pan.
-
In another bowl, mix sliced apples with sugar, flour, and cinnamon. Fill the crust with the apple mixture and dot with butter.
-
Roll out the second crust, place it on top, and seal the edges. Cut slits in the top to allow steam to escape.
-
Brush with beaten egg.
-
Bake for 15 minutes in the preheated oven, then reduce the temperature to 350°F (175°C) and continue baking for 30-35 minutes or until apples are soft and crust is golden brown.
Serving ideas
Slice the pie once it cools for 15 to 30 minutes so the filling sets and you get clean wedges. Serve a warm slice with vanilla ice cream for a classic pairing: cold, creamy ice cream complements the warm, spiced apples. For a richer option, add a drizzle of caramel sauce or a dollop of whipped cream seasoned lightly with vanilla.
If you want a breakfast twist, warm a slice and top it with Greek yogurt and a handful of toasted pecans for a balanced start. For a party, cut the pie into small squares and offer them on a dessert tray with coffee and tea. For a nostalgic touch, sprinkle a few extra cinnamon flakes over each slice right before serving.
How to store it properly
Cool the pie completely at room temperature before storing. If you plan to eat it within two days, leave it loosely covered on the counter with foil or a pie dome; this keeps the crust crisp while protecting it from dust. For longer storage, wrap the cooled pie tightly in plastic wrap or aluminum foil and refrigerate up to four days.
To freeze, wrap a fully cooled pie in plastic wrap, then in foil, and place it in the freezer for up to three months. Thaw overnight in the refrigerator before reheating. Reheat slices in a 350°F oven for 10 to 15 minutes to restore a bit of crispness to the crust. Avoid microwaving if you want to keep the crust flaky; the microwave will make it soggy.
DishGrub Kitchen Tips
Keep everything cold. Chill the butter, use ice water, and refrigerate the dough for several hours. Cold butter creates steam pockets during baking and yields a flakier crust. Do not overwork the dough. Mix until it just comes together; excess gluten makes the crust tough.
Roll the dough gently and handle it lightly. When transferring the crust to the pan, roll it onto the pin and unroll over the pan instead of stretching. That preserves the texture and keeps the dough relaxed. Seal the edges with a light pinch or fork crimp but avoid compressing them too tightly, which flattens the edge layers.
Use a mix of apples. Try half Granny Smith for acidity and half Fuji or Honeycrisp for sweetness and structure. Toss the apples with the sugar and flour just before filling to prevent them from releasing too much juice beforehand. When baking, place a sheet pan on the rack below the pie to catch any drips and keep your oven clean.
Make it your own
Add a teaspoon of lemon zest to the filling to brighten the flavor and balance the sweetness. For deeper spice, stir in a pinch of nutmeg or a quarter teaspoon of ground ginger. If you like a caramelized top, sprinkle a tablespoon of coarse sugar over the egg-washed crust before baking.
If you prefer a single-crust presentation, bake the filling in a deep-dish tart crust and top it with a crumble of oats, brown sugar, and butter for a crisp streusel. For a modern twist, fold thin slices of pear into half the apples or mix in a cup of chopped cranberries in autumn for tart contrast.
If you want to reduce sugar, cut the filling sugar by one-third and choose sweeter apple varieties to compensate. To make the pie dairy-free, swap the butter in the crust for a firm vegetable shortening and use a nondairy butter alternative to dot the filling.
Frequently asked questions
What apples work best for this pie?
Choose apples that hold their shape and offer flavor contrast. Granny Smith provides bright acidity and firm texture; Honeycrisp or Fuji add sweetness and juiciness. Use a mix for depth: aim for a balance so the pie tastes layered rather than uniformly sweet. Avoid overly soft apples like McIntosh unless you want a very tender, almost saucy filling. If you prefer a less sweet pie, increase the proportion of tart apples and reduce the added sugar slightly.
How do I keep the crust from getting soggy?
Start with cold ingredients and a hot oven. Chilling the crust prevents the butter from melting into the dough prematurely, which helps it puff in the oven. Blind-bake the bottom crust for 6 to 8 minutes if you consistently get soggy bottoms, or sprinkle a thin layer of breadcrumbs, crushed graham cracker, or a tablespoon of ground almond on the bottom before adding the filling to absorb excess juices. Also avoid overfilling; too many wet apples release excess liquid during baking.
Can I make the dough ahead of time?
Yes. The dough benefits from resting. Wrap it tightly and refrigerate for up to two days, or freeze for up to a month. When ready to use, let the dough warm just enough to roll without cracking about 10 to 20 minutes on the counter if chilled, longer if frozen and fully thawed. Resting the dough relaxes the gluten and makes rolling easier while preserving the cold butter pockets that create flakiness.
How do I get a golden top without burning the edges?
Brush the top with a beaten egg for that classic golden sheen. If the edges brown too quickly, shield them with a pie shield or loosely wrap foil around the rim partway through baking. That lets the center continue to cook while protecting the crust edge from over-browning. Lower the oven temperature after the first 15 minutes as the recipe directs to finish baking without burning.
Is there an easy way to slice the pie cleanly?
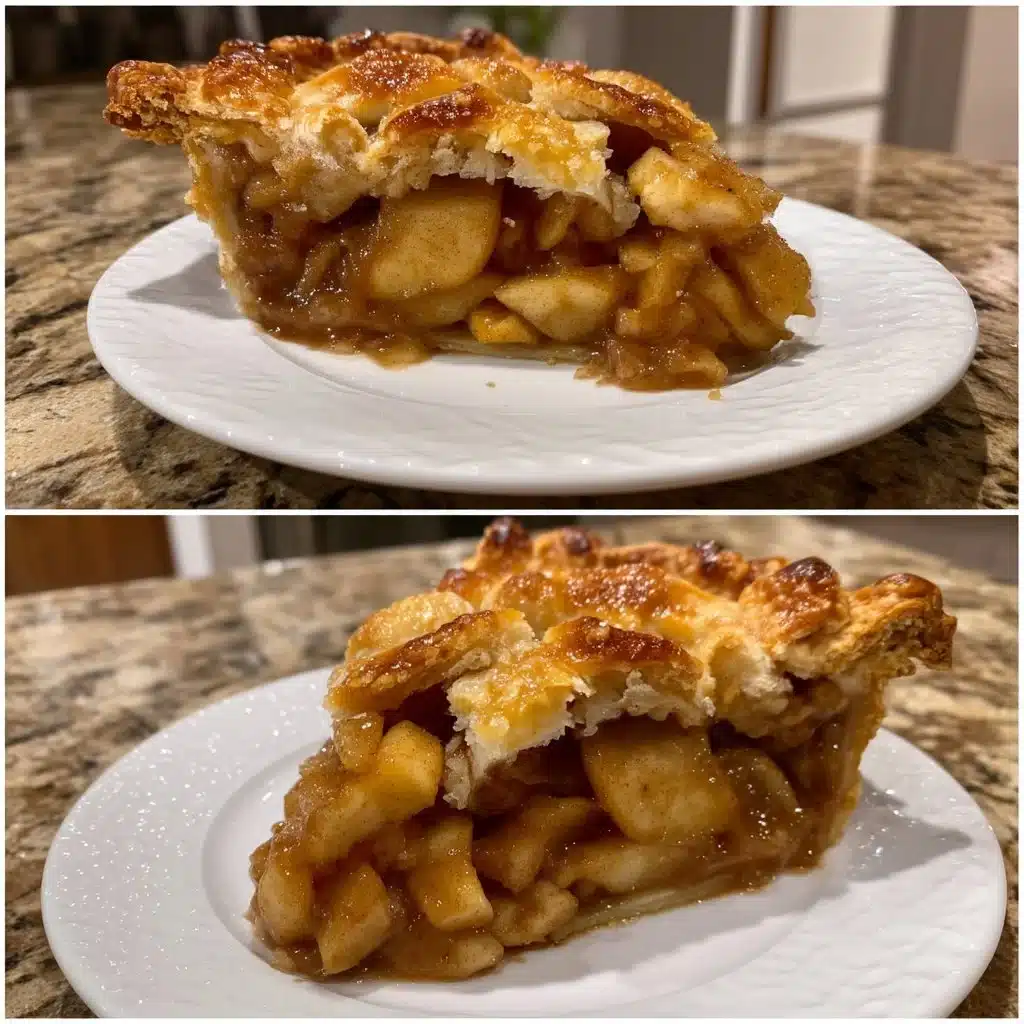
Let the pie rest for at least 30 minutes after it comes out of the oven so the filling sets. Use a sharp, thin-bladed knife and wipe it clean between cuts for neater slices. If you want to serve the pie slightly warm, reheat individual slices in a 350°F oven for 8 to 10 minutes before plating instead of heating the whole pie.
Conclusion
If you want another tested take on a classic, try this Little Spoon Farm’s Easy Apple Pie Recipe (Just like Grandma Made!) for a slightly different technique and extra inspiration.
Print
Homemade Apple Pie
- Total Time: 290 minutes
- Yield: 8 servings
- Diet: Vegetarian
Description
A comforting homemade apple pie with a flaky crust and a balanced filling of sweet and tart apples. Perfect for any occasion.
Ingredients
- 2 1/2 cups all-purpose flour
- 1 cup unsalted butter, chilled and diced
- 1/4 cup sugar
- 1/2 teaspoon salt
- 6 to 8 tablespoons ice water
- 6 to 8 apples, peeled, cored, and sliced
- 3/4 cup sugar
- 2 tablespoons all-purpose flour
- 1 teaspoon cinnamon
- 2 tablespoons butter
- 1 egg, beaten
Instructions
- Preheat the oven to 425°F (220°C).
- In a bowl, mix flour, sugar, and salt. Cut in butter until the mixture resembles coarse crumbs. Stir in ice water, a tablespoon at a time, until the mixture forms a ball. Wrap in plastic and refrigerate for 4 hours or overnight.
- Roll out pie crust on a floured surface. Place one crust in a pie pan.
- In another bowl, mix sliced apples with sugar, flour, and cinnamon. Fill the crust with the apple mixture and dot with butter.
- Roll out the second crust, place it on top, and seal the edges. Cut slits in the top to allow steam to escape.
- Brush with beaten egg.
- Bake for 15 minutes in the preheated oven, then reduce the temperature to 350°F (175°C) and continue baking for 30-35 minutes or until apples are soft and crust is golden brown.
Notes
Let the pie rest for at least 30 minutes after baking for clean slices. Serve warm with ice cream for the perfect dessert.
- Prep Time: 240 minutes
- Cook Time: 50 minutes
- Category: Dessert
- Method: Baking
- Cuisine: American





