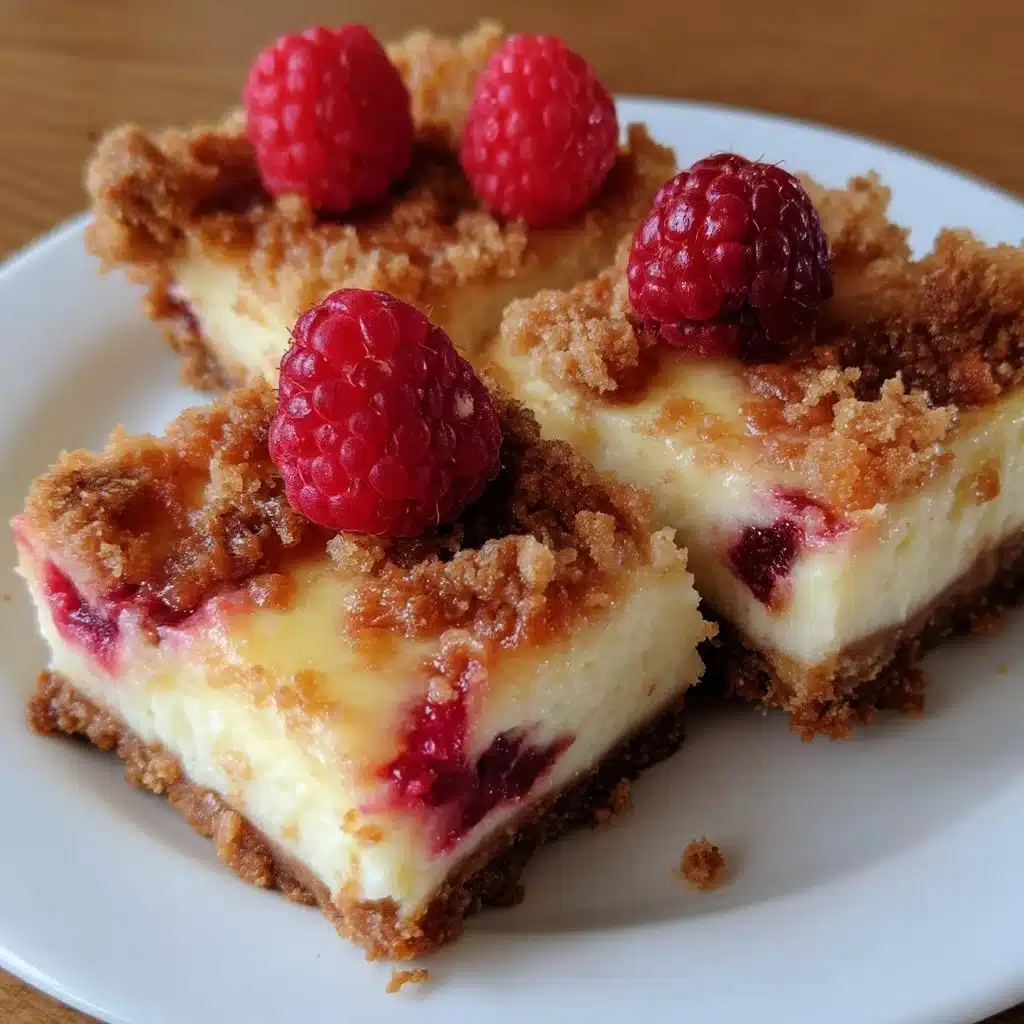
I still remember the first time I brought these lemon raspberry cheesecake bars to a church potluck. I carried a simple 9×9 pan wrapped in a dishtowel, thinking I’d made something pretty and portable. People often tell me desserts taste better when someone else baked them, and that night proved it true: a neighbor asked for the recipe, a couple of kids claimed the corners, and someone’s grandma offered a tip about chilling times. Food does this — it softens the edges of a busy week and invites conversation without asking for much in return. These bars pair bright lemon with creamy cheesecake and soft raspberries, which makes every forkful feel like a tiny celebration you can share.
Comfort food doesn’t always mean heavy or complicated. Sometimes it means a reliable recipe that lives in your baking rotation because it travels well, stores easily, and tastes like a hug. This lemon raspberry cheesecake recipe fits that bill. You can make the crust in five minutes, stir the filling in one bowl, and still look like you put in more effort than you did. Serve them after a casual dinner, at a picnic, or when you need a sweet little lift on a weekday afternoon. They slice cleanly when chilled and freeze beautifully, so you can keep a stash for unexpected company.
At DishGrub we test each recipe until it behaves predictably in a typical American home kitchen — average oven, standard measuring cups, one mixer or strong whisk. We focus on cozy, practical recipes you’ll actually make more than once, not the kind of elaborate desserts that look great on a food shoot and fall apart at home. If you enjoy simple citrus desserts, you might also like our step-by-step easy lemon bars guide that shares quick techniques for bright, tangy bars you can whip up any time.
Why this recipe works
The balance between the buttery graham crust and the silky lemon cheesecake filling makes these bars sing. The crust provides structure and a toasty flavor that counters the bright lemon and delicate raspberries. Using full-fat cream cheese yields a smooth, creamy texture that holds its shape when you slice the bars after chilling. The eggs and baking time set the filling without overbaking, which keeps the center dense but still tender. Fresh lemon juice and zest brighten the dairy notes and lift the raspberries so the dessert never feels too heavy.
This recipe also wins because it uses minimal bowls and tools. You can press the crust into the pan with the bottom of a measuring cup, beat the filling in one bowl, and fold in raspberries with a spatula. The straightforward method reduces the chance of overworking the batter, which can cause cracks or a gritty texture. Chill time is important: cooling solidifies the filling and sharpens the lemon flavor, so plan ahead for refrigeration before slicing.
How to prepare Lemon Raspberry Cheesecake Bars
Ingredients
- 1 cup graham cracker crumbs
- 1/4 cup sugar
- 1/2 cup unsalted butter, melted
- 16 oz cream cheese, softened
- 1 cup sugar
- 3 large eggs
- 1/4 cup fresh lemon juice
- 1 tablespoon lemon zest
- 1 cup fresh raspberries
Instructions
- Preheat your oven to 325°F (163°C).
- In a bowl, mix graham cracker crumbs, 1/4 cup sugar, and melted butter.
- Press the crumb mixture into the bottom of a greased 9×9 inch baking pan to form an even crust.
- In a large bowl, beat softened cream cheese until smooth.
- Gradually add 1 cup sugar to the cream cheese and beat until incorporated.
- Beat in the eggs one at a time until the mixture is smooth.
- Add lemon juice and lemon zest and mix until well combined.
- Gently fold in the raspberries with a spatula, trying not to mash them.
- Pour the cheesecake mixture over the prepared crust and spread it into an even layer.
- Bake for 25 to 30 minutes, or until the center is set but not browned.
- Remove the pan from the oven and allow it to cool completely at room temperature.
- Refrigerate the cooled bars for at least 2 hours to firm up before cutting.
- Cut into squares and serve chilled.
Serving ideas
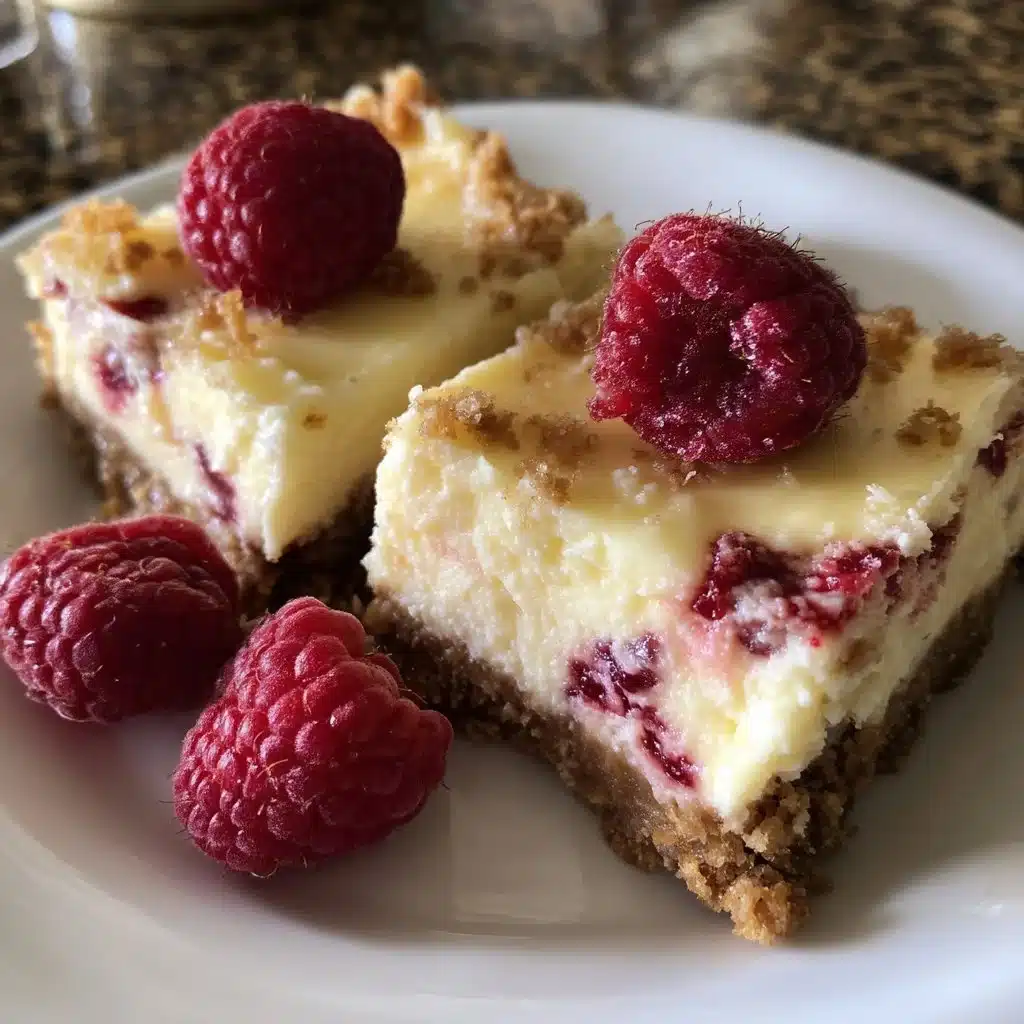
Serve these bars chilled for clean slices and the best contrast of textures. Top a bar with a single extra raspberry and a thin ribbon of lemon zest for a pretty, effortless garnish. For a brunch spread, arrange them alongside coffee cake, fresh fruit, and a carafe of iced tea — the lemon and raspberry keep the plate feeling light. If you want to get playful, pass a small bowl of lightly sweetened whipped cream so guests can add a dollop. These bars also pair surprisingly well with a glass of sparkling wine or lemonade for an al fresco dessert.
When serving to a crowd, cut the bars into smaller squares — 24 bite-sized pieces allow people to sample several desserts. For a dessert plate, serve one larger square with a drizzle of raspberry coulis and a mint leaf to make the presentation look intentional without extra fuss.
How to keep leftovers
Refrigerate leftovers in an airtight container for up to 4 days to keep the crust from softening and the filling from absorbing fridge odors. If you stack bars, place parchment or wax paper between layers to prevent sticking. To freeze, wrap individual bars tightly in plastic wrap and then place them in a freezer bag; they keep well for up to 2 months. Thaw frozen bars overnight in the refrigerator for best texture, and avoid microwaving directly, which can make the filling weep.
If the crust softens after refrigeration, let the bars sit at room temperature 10 to 15 minutes before serving to slightly lift the texture without melting the filling. For travel, pack chilled bars in a cooler with ice packs to maintain their structure until you reach your destination.
DishGrub Kitchen Tips
- Make sure your cream cheese is fully softened before beating to avoid lumps; take it out of the fridge an hour before baking or cut it into cubes to speed softening.
- Use fresh lemon juice and zest for the cleanest, brightest flavor; bottled lemon juice can taste flat.
- Fold in raspberries gently to keep some whole berries intact and prevent the filling from turning pink all over.
- If you don’t have fresh raspberries, use frozen raspberries that you thaw and drain well to avoid adding extra liquid.
- Press the crust firmly and evenly to ensure each bar holds together when sliced.
- To test doneness, gently shake the pan; the center should have a slight wobble but not be liquid.
- Run a thin knife along the edges after cooling and before slicing to get cleaner cuts.
For more tips on citrus desserts and quick crusts, try our concise guide to bright lemon bars at our lemon bars guide, which shares tricks that work across many bar-style recipes.
Recipe variations
- Mixed berries: Swap raspberries for a mix of blueberries and blackberries for a slightly sweeter, denser filling.
- Raspberry swirl: Pulse half the raspberries with a touch of sugar and swirl into the filling with a knife for pretty marbling.
- Lime twist: Replace lemon juice and zest with lime for a tangier, tropic-forward profile.
- Chocolate crust: Use chocolate graham crumbs or add 2 tablespoons cocoa powder to the crust for a chocolate-lemon contrast.
- Mini bites: Bake in a muffin pan lined with paper cups for single-serve cheesecake bites; reduce bake time to 18–22 minutes.
Common questions
Q: Can I use low-fat or Neufchâtel cream cheese instead of full-fat cream cheese?
A: You can, but the texture will become slightly less rich and may be a touch less stable when chilled. Full-fat cream cheese yields the creamiest, most stable filling. If you use reduced-fat cheese, chill the bars longer before slicing and handle them gently to maintain clean cuts.
Q: Can I make this recipe ahead of time for a party?
A: Absolutely. Make the bars a day ahead and refrigerate them, covered, until serving. For more lead time, freeze them up to two months and thaw overnight in the refrigerator. Chilled bars slice neater, so you’ll find that prepping ahead improves presentation and reduces last-minute stress.
Q: My raspberries bled into the filling and made it pink. How can I avoid that?
A: Raspberries carry natural juice that can color the filling, especially if you stir them vigorously. Gently fold whole berries into the batter and reserve a few for topping after baking. If you want to keep color separation, coat the raspberries in a light dusting of flour before folding them in; the flour helps absorb surface juices and reduces bleeding.
Q: Can I use a springform pan instead of a 9×9 baking pan?
A: You can, but a springform pan makes it harder to press the crust evenly and remove the bars cleanly. If you use a springform, line the bottom with parchment and chill the crust before adding the filling to help stability. Keep in mind that baking time may vary slightly with different pan materials.
Q: Do I need to strain the lemon juice or zest?
A: No, zest and fresh juice go straight into the batter. Zest adds aromatic oils and flavor, while juice provides acidity. Make sure to zest before juicing the lemon to avoid losing any flavorful peel.
Conclusion
If you want an alternate take on the lemon-raspberry idea with step-by-step photos and variation ideas, check out Raspberry Lemonade Cheesecake Bars – Handle the Heat for inspiration and extra technique tips.