
Nothing beats a tiny, homemade treat that tastes like a hug. Warm kitchens, two hands working together, and the simple joy of chocolate and peanut butter coming togetherthose are the moments that stick with you. Serve these at family game night, tuck a stack into your kid’s lunchbox, or bring them to a potluck and watch people trade napkins and stories over one small dessert. Comfort food doesn’t need to be complicated; it just needs to be honest and shareable.
I learned this recipe on a rainy afternoon when I wanted something sweeter than a cookie but easier than baking a whole tray. A small batch of peanut butter cups felt perfect: no fussy dough, no long bake time, just a few pantry staples and patience. They freeze well, travel well, and they disappear fast. You can make them with chunky or creamy peanut butter, swap in dark chocolate if you want something less sweet, or give them a sprinkle of flaky salt for contrast. The best part? You can make a batch in under an hour that tastes like you spent all afternoon in the kitchen.
At DishGrub we test recipes until they work in everyday kitchens. We focus on simple methods, reliable results, and comfort food that cooks up without drama. Our goal: recipes you’ll make again and again, no specialty equipment required. If you like these mini peanut butter cups, try our easy snack that packs similar flavor and energy in bite-sized form: peanut butter energy bites. We keep things cozy, practical, and reliably delicious so home cooks can spend less time stressing and more time together.
Why you’ll love this dish
This recipe strips the classic peanut butter cup down to its happiest parts: creamy peanut butter filling and a crisp chocolate shell. It works because the textures balancesoft center, firm chocolatewhile the ingredients stay pantry-friendly. You need no tempering skills, and the method uses simple melting and chilling. That means you can pull these together when guests drop by or when you need a small, satisfying treat without committing to a whole cake or a long baking session.
These cups also scale easily. Make a dozen for a dessert tray or a double batch for holiday sharing. They freeze solid for long-term storage, so you can portion out treats for later. Because the filling uses powdered sugar, it sets firm enough to handle, unlike raw peanut butter that can remain sticky. A touch of vanilla rounds the flavor and makes these taste like something you bought from a candy shop, but better because you made them yourself.
How to prepare Homemade Peanut Butter Cups
Ingredients
- 1 cup peanut butter
- 1 cup powdered sugar
- 2 cups chocolate chips
- 1 tablespoon coconut oil
- 1/2 teaspoon vanilla extract
- Paper cupcake liners
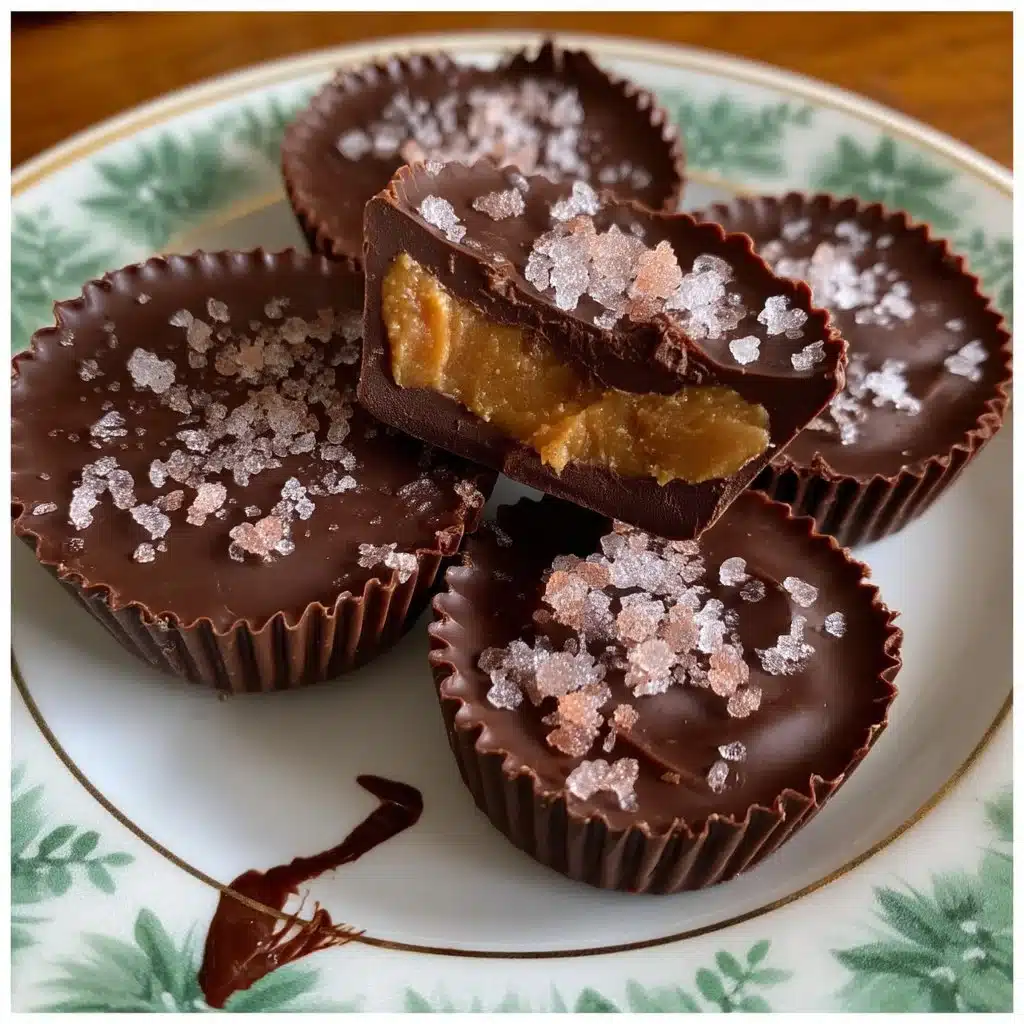
Instructions
- In a medium bowl, mix peanut butter, powdered sugar, and vanilla extract until smooth.
- Melt chocolate chips and coconut oil together in a microwave-safe bowl, stirring until fully melted.
- Line a muffin tin with paper liners.
- Pour a layer of melted chocolate into each liner, enough to cover the bottom.
- Add a spoonful of the peanut butter mixture on top of the chocolate.
- Pour more melted chocolate on top to completely cover the peanut butter layer.
- Chill in the refrigerator for about 30 minutes until firm.
- Remove from liners and enjoy!
Serving ideas
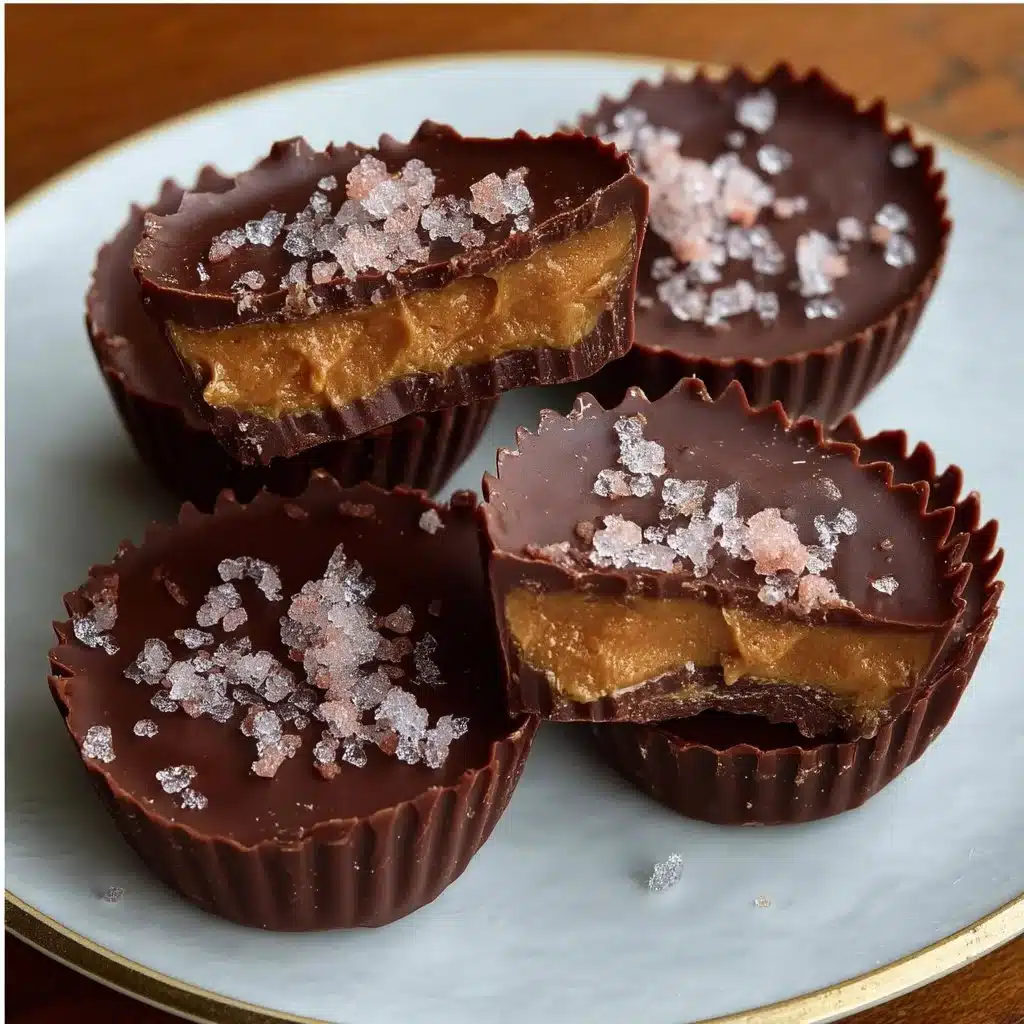
Serve these peanut butter cups at room temperature so the chocolate gives slightly when you bite it. Arrange them on a small platter with other simple treatspretzel twists, salted nuts, or dried fruitor pair with coffee or milk for a classic combo. For a more elevated presentation, top each cup with a light sprinkle of flaky sea salt right before serving; the salt enhances the chocolate and peanut butter contrast. If you bring them to a gathering, use mini cupcake liners to make them look extra polished and easy to pick up.
You can also incorporate them into desserts: chop a few and fold into brownie batter before baking for pockets of peanut butter goodness, or press one into soft ice cream as an instant sundae topping. For gifting, stack them in a small box with parchment between layers and tie with twine; they make a thoughtful, homemade present that feels personal and nostalgic.
How to store it properly
Store these peanut butter cups in a single layer in an airtight container to keep the chocolate shell from sweating or getting sticky. If you plan to eat them within a few days, keep the container in the refrigerator; this keeps the centers firm and extends freshness for up to two weeks. For longer storage, freeze them in an airtight container with parchment between layers for up to three months.
When you move frozen cups to the refrigerator, let them thaw for about 15–20 minutes before serving to avoid condensation on the chocolate. If you store at room temperature in a warm kitchen, the chocolate can soften and the cups may lose their firm structure. Refrigeration or freezing gives you control over texture and presentation.
DishGrub Kitchen Tips
- Use smooth peanut butter for the creamiest filling. Natural peanut butter sometimes separates and can make the filling oily or grainy. If you want to use natural, stir it well and reduce any extra oil before mixing with powdered sugar.
- Measure powdered sugar by spooning it into the cup and leveling it off; packing it down makes the filling too dense and overly sweet.
- Melt chocolate gently. Use the microwave in short bursts20 to 30 secondsstirring between intervals. This prevents scorching and keeps the chocolate glossy when it sets.
- Coconut oil thins and shines the melted chocolate, making it easier to pour and giving a nicer finish. If you don’t have coconut oil, use a neutral vegetable oilbut add it sparingly.
- Work quickly when filling the liners. The chocolate sets as it cools, so have your peanut butter mixture and liner tray ready before you start piping or spooning chocolate.
- For cleaner edges, let the bottom chocolate set fully before adding the filling; you can speed this in the freezer for a couple of minutes, but don’t let the chocolate get brittle.
Make it your own
- Swap fillings: Try almond butter, sunbutter, or even a half-and-half mix of peanut butter and melted Nutella for a hazelnut twist.
- Add texture: Fold in a handful of crushed pretzels, mini toffee bits, or toasted chopped peanuts into the peanut butter mixture for crunch.
- Flavor boosters: Stir a pinch of cinnamon, a dash of instant espresso powder, or a few drops of almond extract into the filling for a flavor lift.
- Dark or milk chocolate: Use dark chocolate chips for a less-sweet profile or white chocolate for a sweeter, festive look. If using white chocolate, keep the coconut oil amount minimal to avoid making it too runny.
- Mini or regular size: Use mini muffin liners to make bite-sized cups for parties, or standard liners for a more substantial treat. Adjust the amount of filling accordingly.
- Holiday upgrades: Top each cup with a sprinkle of colored sugar, crushed candy cane, or a small edible decoration to match seasonal themes.
Common questions
Q: Can I use natural peanut butter in these cups?
A: Yes, but natural peanut butter contains more oil and can make the filling looser. If you want to use natural, stir it well and try to remove excess oil before measuring. You may need to add a little more powdered sugar to achieve a firm, moldable consistency. Keep in mind that natural peanut butter can change the texture and shelf life slightly; store these cups in the refrigerator to help them hold shape.
Q: How do I prevent the chocolate from blooming (white streaks) after chilling?
A: Bloom happens when chocolate develops a whitish film from fat or sugar migration, often due to rapid temperature changes. To minimize bloom, cool the cups in the refrigerator until set, then move them to room temperature just before serving. Avoid large temperature swings and keep the cups in an airtight container to reduce moisture exposure. Using good-quality chocolate and adding a small amount of coconut oil for shine helps the surface set evenly.
Q: Can I make these ahead for a party?
A: Absolutely. These peanut butter cups keep well when refrigerated for up to two weeks and freeze for up to three months. For a party, make them up to a week in advance and keep them refrigerated, or freeze and thaw them in the refrigerator the day before. Package refrigerated cups in a single layer or with parchment between layers to avoid sticking, and bring them to room temperature about 10 minutes before serving for the best bite.
Q: My filling is crumbly. What did I do wrong?
A: A crumbly filling means it needs a touch more moisture or fat. Add a teaspoon of milk, a bit more vanilla, or a small drizzle of neutral oil and mix until smooth. Alternatively, a slightly higher ratio of peanut butter to powdered sugar will give a smoother, creamier result. Work in small increments to avoid making the filling too soft.
Q: Can I temper the chocolate for a glossy finish without coconut oil?
A: You can temper chocolate to get a glossy snap, but tempering takes more time and technique. For a quick home method, the coconut oil helps the chocolate set shiny without tempering. If you prefer not to use coconut oil, melt the chocolate gently and try a simple seeding method: melt two-thirds of the chocolate to 115°F (use a thermometer), remove from heat, stir in the remaining chopped chocolate to cool it to about 88–90°F for dark chocolate, then proceed. Tempered chocolate will set firmer and can stay glossy at room temperature.
Conclusion
If you want a detailed, step-by-step reference with photos and extra tips while you work, check the classic guide over at Homemade Peanut Butter Cups – i am baker. This recipe gives you a fast, no-fuss version that still delivers that homemade candy-shop feeling, and you’ll find lots of ways to personalize it for your family and gatherings.
Print
Homemade Peanut Butter Cups
- Total Time: 30 minutes
- Yield: 12 servings
- Diet: Vegetarian
Description
Creamy peanut butter filling coated in a crisp chocolate shell, these homemade peanut butter cups are a simple and delightful treat.
Ingredients
- 1 cup peanut butter
- 1 cup powdered sugar
- 2 cups chocolate chips
- 1 tablespoon coconut oil
- 1/2 teaspoon vanilla extract
- Paper cupcake liners
Instructions
- In a medium bowl, mix peanut butter, powdered sugar, and vanilla extract until smooth.
- Melt chocolate chips and coconut oil together in a microwave-safe bowl, stirring until fully melted.
- Line a muffin tin with paper liners.
- Pour a layer of melted chocolate into each liner, enough to cover the bottom.
- Add a spoonful of the peanut butter mixture on top of the chocolate.
- Pour more melted chocolate on top to completely cover the peanut butter layer.
- Chill in the refrigerator for about 30 minutes until firm.
- Remove from liners and enjoy!
Notes
These cups pair well with coffee or milk. For a gourmet touch, sprinkle with flaky sea salt before serving.
- Prep Time: 15 minutes
- Cook Time: 15 minutes
- Category: Dessert
- Method: No-Bake
- Cuisine: American





