
I still remember walking into my grandmother’s kitchen on a rainy afternoon and finding a warm tray of biscuits cooling on the counter. The house smelled like butter and a subtle tang of milk that somehow wrapped around every other scent and made the world feel safer. We sat around the little round table, breaking biscuits and smearing them with jam and honey while rain traced the windows. That memory anchors my cooking the way a good recipe anchors a family meal simple, dependable, and comforting. A flaky biscuit carries more than flour and fat; it carries patience, small rituals, and the kind of company that turns ordinary days into moments.
Comfort food binds people. A batch of homemade buttermilk biscuits makes the kitchen a gathering place. Whether you serve them with sausage gravy on a Sunday morning or split them for a quick sandwich on a busy weekday, biscuits deliver warmth and familiarity. They require only a handful of pantry staples and a little technique enough to make you feel capable and generous. When I teach friends how to make them, I focus on keeping the ingredients cold and the work gentle. That’s where the magic lives: resist overworking the dough and let the oven do the rest.
DishGrub tests each recipe until it behaves predictably in home kitchens. We keep techniques straightforward and swap fuss for clarity so cooks can create cozy, crowd-pleasing meals without stress. Our buttermilk biscuit recipe travels well across breakfast, dinner, and everything in between because we wrote it for practical cooks who want reliable results. If you love fluffy, quick breakfast breads, you might also enjoy our take on fluffy buttermilk pancakes, which follow the same forgiving spirit: simple ingredients, clear steps, and happy outcomes. We aim to help you feed folks in ways that feel like home.
Why you’ll love this dish
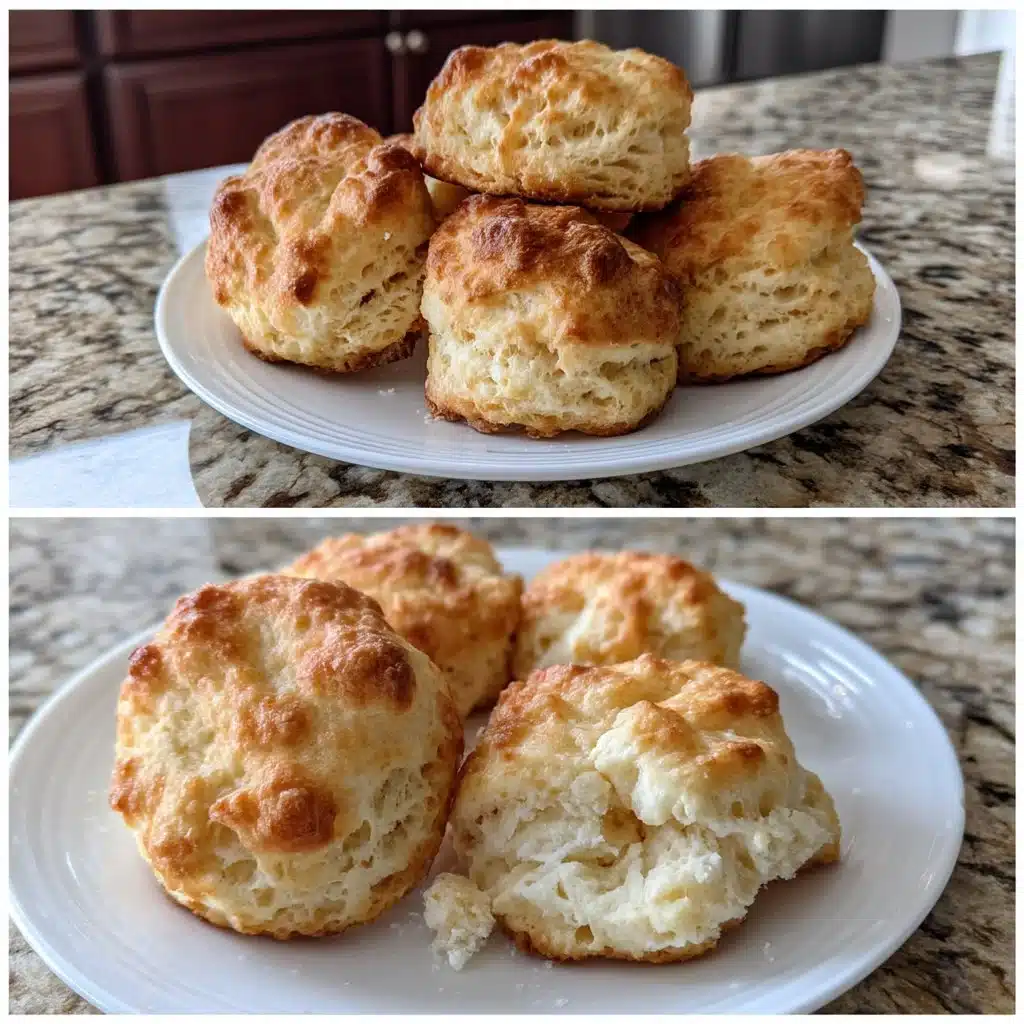
These biscuits rise tall, flake easily, and brown to a buttery top without any fuss. The combination of baking powder and a little baking soda gives lift and gentle browning, while buttermilk adds that tang that keeps the flavor interesting. Keeping the butter cold and handling the dough gently creates visible layers as the steam lifts the dough in the oven. You get a tender interior and a light, crispy exterior with basic tools and modest effort.
The method works in a busy U.S. kitchen because it uses one bowl and a floured surface for shaping. You can scale this recipe up for a family breakfast or halve it for two people. The dough tolerates a few minutes in the fridge if you need to prep ahead, and biscuits travel well from pan to plate, making them ideal for casual gatherings.
How to prepare Homemade Buttermilk Biscuits
Start with cold butter and chilled buttermilk. Measure dry ingredients accurately, and whisk them together first to disperse leavening evenly. Cut the butter in quickly you want pea-sized lumps, not a paste. When you add the buttermilk, stir until the dough comes together but still looks a little shaggy. Turn the dough out and fold it over itself a few times to create layers; you do not need heavy kneading. Rolling to about one inch gives biscuits that bake up tall and tender. If you prefer extra flaky, fold the dough into thirds and roll once more before cutting.
When you cut biscuits, press straight down with a cutter instead of twisting; twisting seals the edge and reduces rise. Arrange biscuits close together on the baking sheet for taller sides, or space them for crisper edges. A hot oven at 450°F does the work quickly, so keep a close eye toward the end of the bake to prevent over-browning. Serve warm straight from the oven for the best texture and flavor.
Ingredients
- 2 cups all-purpose flour
- 1 tablespoon baking powder
- 1/2 teaspoon baking soda
- 1 teaspoon salt
- 1/4 cup unsalted butter, cold and cubed
- 3/4 cup buttermilk

Instructions
-
Preheat the oven to 450°F (230°C).
-
In a large bowl, whisk together the flour, baking powder, baking soda, and salt.
-
Add the cold, cubed butter and mix until the mixture resembles coarse crumbs.
-
Stir in the buttermilk until just combined.
-
Turn the dough onto a floured surface and knead gently a few times.
-
Roll out to about 1-inch thickness and cut with a biscuit cutter.
-
Place on a baking sheet and bake for 10-12 minutes or until golden brown.
Serving ideas
Serve these biscuits split and slathered with butter and honey for a classic, easy treat. Top them with sausage gravy for a hearty brunch that feeds a crowd. For a savory sandwich, fill a warm biscuit with fried chicken, a pickle, and a swipe of hot sauce. You can also lightly brush the tops with melted butter mixed with chopped herbs and garlic for a fragrant accompaniment to soups and stews.
Turn leftovers into breakfast sandwiches by toasting the split biscuits and adding eggs and cheese. For a sweet spin, slice the biscuits, fill them with whipped cream and berries, and dust with powdered sugar for an impromptu shortcake that still feels homey.
How to store it properly
Cool the biscuits completely before storing to avoid sogginess. Place cooled biscuits in an airtight container or resealable bag and refrigerate for up to three days. For longer storage, flash-freeze on a baking sheet, then transfer to a freezer-safe bag for up to three months. Reheat refrigerated biscuits in a 350°F oven for 8-10 minutes, covered with foil if they start browning too quickly.
To revive frozen biscuits, place them on a baking sheet from frozen and heat at 350°F for about 12-15 minutes, or until warmed through. For a crisper exterior, finish under the broiler for a minute, watching closely. You can microwave biscuits for 15–20 seconds for a quick fix, but the oven returns the best texture.
DishGrub Kitchen Tips
Keep your ingredients cold. Chill the butter right up until you cut it and use cold buttermilk. Cold fat creates steam pockets that lift dough and separate layers. Use a pastry cutter, two forks, or your fingertips to cut the butter in quickly; if the butter warms, pop the bowl in the fridge for a few minutes.
Work quickly and lightly. Overworking the dough develops gluten and yields tougher biscuits. Fold or pat the dough rather than knead hard a few gentle folds build layers without strain. If you have a bench scraper, use it to lift and turn the dough cleanly.
Choose the right cutter. A straight-sided biscuit cutter gives the best rise because it doesn’t twist the dough. If you don’t have a cutter, a clean glass works fine. For tall biscuits, position them close together on the sheet so they support each other as they rise.
Make it your own
Add grated sharp cheddar and chopped chives to the dry mix for a cheesy, savory biscuit that pairs beautifully with soups and chili. Mix a tablespoon of sugar into the dry ingredients for a slightly sweet biscuit that complements jam. For a whole-grain version, replace up to half the all-purpose flour with white whole wheat flour and add 1–2 tablespoons more buttermilk if the dough feels dry.
Try folded-in cooked bacon bits and a teaspoon of smoked paprika for a bold flavor. For a drop-biscuit shortcut, use a tablespoon-of-dough dropper to place spoonfuls on the sheet and bake; you’ll get rustic, no-roll biscuits that still taste wonderful. If you like a glossy top, brush with beaten egg or milk before baking.
Common questions
Q: Can I substitute milk for buttermilk?
A: Regular milk won’t provide the same tang or reaction with the baking soda, but you can make a quick buttermilk substitute by adding one tablespoon of lemon juice or white vinegar to a cup measure, then filling it to the one-cup line with milk and letting it sit for five minutes. Use the same volume called for in the recipe. The acidity in the soured milk reacts with baking soda and helps the biscuits rise properly.
Q: Why are my biscuits dense?
A: Density often comes from overworking the dough, too much flour, or old leavening agents. Measure flour by spooning it into your cup and leveling instead of scooping directly into the bag. Mix until the dough just comes together and limit kneading to a few gentle folds. Check your baking powder and baking soda if they’re older than six months, replace them for reliable rise.
Q: How do I get tall layers instead of flat biscuits?
A: Keep the butter cold and cut it into pea-sized pieces. Use a straight-sided cutter and press straight down without twisting. Place biscuits touching on the baking sheet to encourage them to rise vertically. Also, bake in a preheated oven at a high temperature so the steam forms quickly and lifts the layers before the butter melts completely.
Q: Can I make the dough ahead?
A: Yes. After you cut the biscuits, arrange them on a baking sheet, cover tightly with plastic wrap, and refrigerate for up to 24 hours. Bake straight from the fridge, adding a minute or two if needed. You can also freeze cut, unbaked biscuits in a single layer, then transfer to a freezer bag. Bake from frozen, adding a few extra minutes to the bake time.
Conclusion
For a reliable, easy biscuit recipe you can return to again and again, check the classic variation on Easy Buttermilk Biscuits – Live Well Bake Often for more tips and photo guidance.





