
I remember the first time I pulled a pan of warm, honey-glazed rolls from the oven — the kitchen smelled like a small bakery, and everyone in the house drifted toward the heat even before I finished brushing on the butter. We tore into the rolls while they still steamed, and the soft, slightly sweet crumb made plain butter feel like a celebration. Those moments — wooden spoons, aprons with flour-smudged pockets, and the simple ritual of passing a warm roll around the table — show why small acts of cooking create big comfort. These honey butter dinner rolls carry that same cozy magic: they work as a side that pleases picky eaters, a snack for late-night nibblers, and a centerpiece for holiday spreads when you want something homemade but not fussy.
DishGrub builds recipes for those exact moments. We test each recipe until it performs reliably in ordinary home kitchens. We aim for cozy flavor, practical technique, and clear troubleshooting so you get predictable, satisfying results without a list of obscure ingredients. If you like one-pan dinners and simple bakes that still feel special, you’ll find recipes across the site that hit that mark, like our take on baked honey garlic chicken thighs, which pairs nicely with these rolls. This honey butter dinner roll recipe keeps method and timing straightforward while giving you the soft interior, golden top, and glossy buttery finish that make rolls worth baking.
Why you’ll love this dish
Baking dinner rolls at home changes how you think about dinner. Instead of a plate of reheated sides, you offer something fresh and fragrant — and people notice. These rolls combine a subtle honey sweetness with a tender, pillowy crumb that pairs with savory mains and sweet spreads alike. The dough relies on instant yeast, so you skip the extra wait and still get great rise. You shape the dough into simple balls, which keeps the technique approachable for beginners and makes the rolls look uniformly attractive without complicated braiding or proofing tricks.
The recipe scales easily: double the batch for a holiday crowd or halve it for a quiet dinner. You can bake them closely together for soft-sided pull-apart rolls or space them for more individual crust. Because the dough uses warm milk and a modest amount of butter, the crumb stays moist for a day or two, and a quick rewarm in the oven or microwave brings them back to a just-baked texture. If you want to keep your meal simple, serve these alongside roasted chicken or a pot of soup, and you’ll have a comfort-food dinner that feels complete.
How to prepare Honey Butter Dinner Rolls
Ingredients
- 2 cups warm milk
- 1/2 cup honey
- 1/4 cup unsalted butter, melted
- 4 cups all-purpose flour
- 1 packet (2 1/4 teaspoons) instant yeast
- 1 teaspoon salt
- 1/4 cup unsalted butter, softened (for brushing)
Instructions
-
Warm the milk until it feels warm to the touch but not hot.
-
Combine the warm milk, honey, and melted butter in a large bowl.
-
Stir the instant yeast into the milk mixture.
-
Wait five minutes to let the yeast activate and become foamy.
-
Add the flour and salt to the bowl a little at a time.
-
Mix until the ingredients come together into a rough dough.
-
Turn the dough onto a lightly floured surface and knead until smooth.
-
Continue kneading for about five to seven minutes until the dough feels elastic.
-
Grease a clean bowl and place the dough inside.
-
Cover the bowl and let the dough rise in a warm spot until it doubles in size.
-
Punch the risen dough down to release air pockets.
-
Divide the dough into equal pieces for uniform rolls.
-
Shape each piece into a tight ball and place them into a greased baking dish.
-
Cover the dish and let the rolls rise again until puffy, about thirty minutes.
-
Preheat the oven to 350°F (175°C).
-
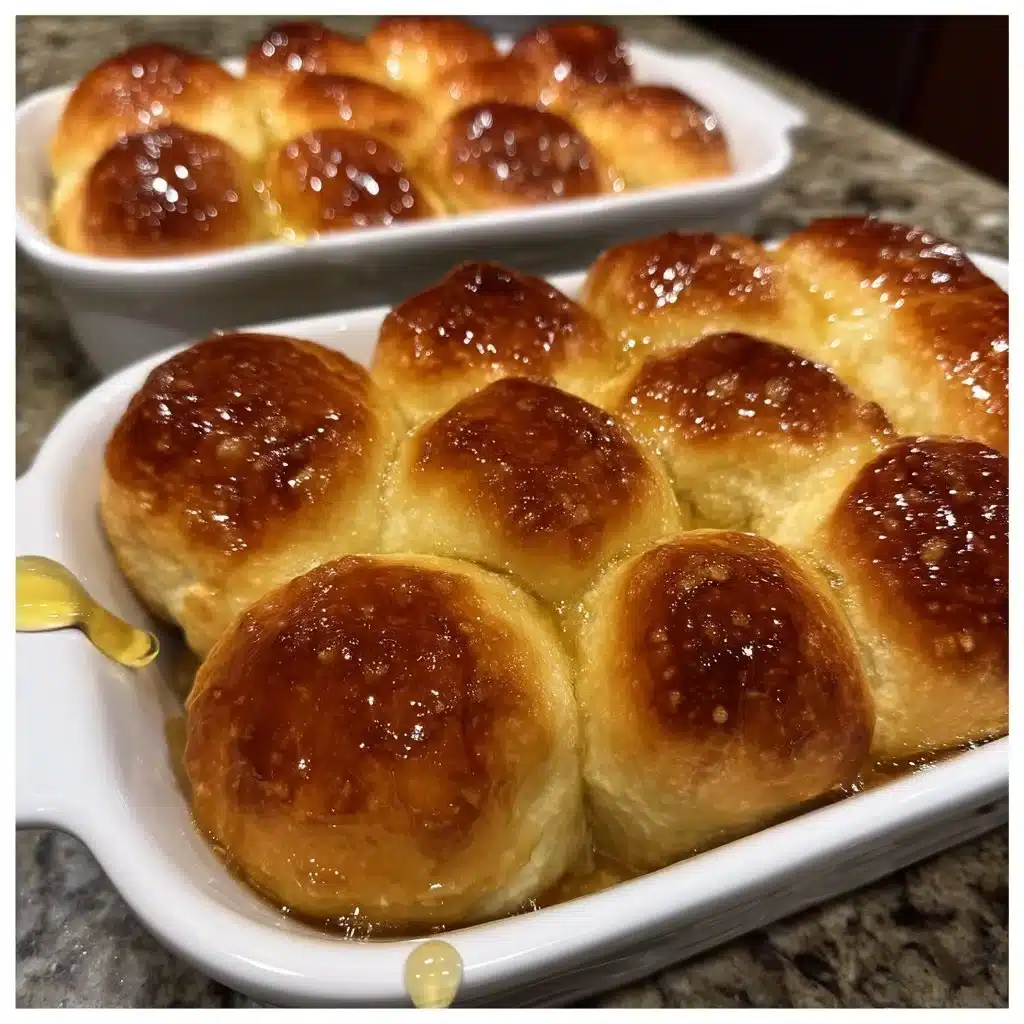
Bake the rolls for fifteen to twenty minutes until they turn golden brown on top.
-
Remove the rolls from the oven and brush the tops with the softened butter.
-
Cool briefly and serve warm.
Serving ideas
These rolls work in many combinations. Serve them warm with extra honey and softened butter for a brunch or alongside a roast for a Sunday dinner. Their gentle sweetness complements salty mains such as ham or bacon-forward casseroles. For casual meals, split a roll, fill it with sliced turkey and mustard, and you have a quick slider-style sandwich. Pair them with a creamy soup or chili to soak up broth and add comforting texture. For an indulgent touch, toast halves and spread with sweetened cream cheese or apple butter for a dessert-style finish. Keep the presentation simple: a small basket lined with a clean towel and a little ramekin of extra honey feels intentional without fuss.
How to keep leftovers
Store cooled rolls in an airtight container or a resealable bag at room temperature for up to two days. To maintain softness, tuck a small piece of bread or a folded paper towel in the container — it helps preserve moisture without making the rolls soggy. For longer storage, freeze the cooled rolls on a baking sheet until firm, then transfer them to a freezer bag for up to three months. Reheat frozen rolls by wrapping them in foil and warming in a 350°F oven for about 10–15 minutes, or microwave individual rolls for 15–25 seconds for a quick revival. If the crust softens after storing, a short stint under the broiler (watch closely) or a few minutes in a hot oven will refresh the exterior while keeping the interior tender.
DishGrub Kitchen Tips
Make the dough environment work for you. If your kitchen feels cool, let the dough rise inside a turned-off oven with the oven light on — it creates a gently warm spot that helps yeast perform. We test recipes so the results remain consistent in average U.S. kitchens, and that little oven-light trick cuts proofing time reliably. Use a kitchen scale if you have one: weighing flour gives more consistent results than measuring by cup, especially for softer textures like these rolls. For shaping, cup your hand over each dough piece and roll it against the counter to form smooth tops; that surface tension helps the rolls rise tall and even.
If you plan a full dinner, pair these rolls with easy family favorites from our dinner collection for balanced, approachable meals. Try pairing them with one of our weeknight mains for a complete, comforting menu idea that comes together without stress: easy weeknight dinners.
Make it your own
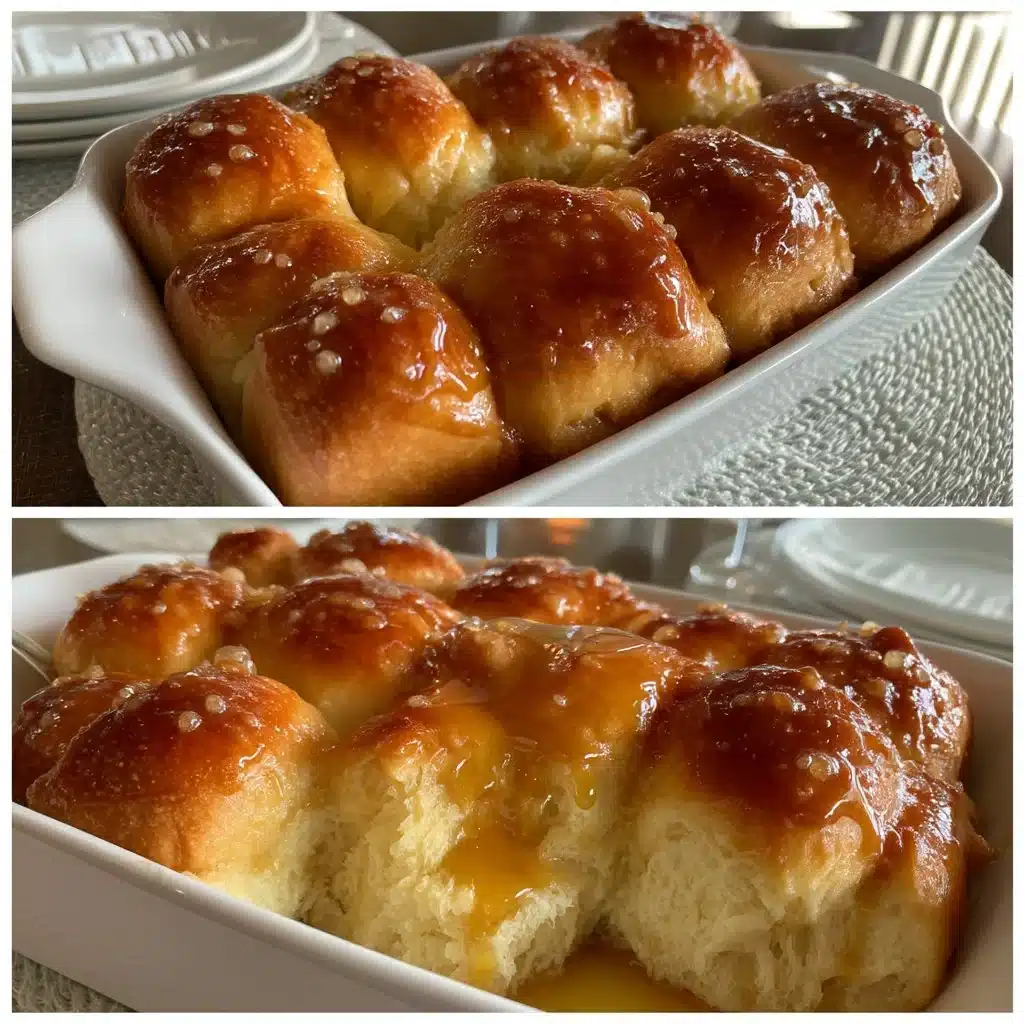
You can adapt the dough to match your meal. Fold in a tablespoon of chopped fresh rosemary or a teaspoon of grated lemon zest for a fragrant twist that pairs well with roasted poultry. Brush the tops with a honey-butter glaze (mix two tablespoons honey with one tablespoon melted butter) right after baking for extra shine and sweetness. For savory rolls, swap half the honey for two tablespoons of softened butter and sprinkle coarse salt and herbs on top before baking. If you prefer a richer crumb, replace half the milk with buttermilk or add an extra tablespoon of butter to the dough. For pull-apart rolls, place the shaped balls closer together in the pan so their sides touch and bake as directed.
Frequently asked questions
Q: Can I use active dry yeast instead of instant yeast?
A: Yes, you can substitute active dry yeast for instant yeast, but you must activate it first. Warm the milk to a similar lukewarm temperature and sprinkle the active dry yeast over it, then stir in a teaspoon of the honey to feed the yeast. Let it sit for about five to ten minutes until it becomes foamy before adding to the rest of the ingredients. This extra step wakes the yeast and ensures a reliable rise. Reduce the total rise time if your dough doubles faster in a warm kitchen, and always watch for visual cues rather than relying strictly on timing.
Q: How do I know if the rolls are done?
A: The visual cue gives you the best answer: the tops should display an even golden brown color. Tap the bottom of a roll; it should sound hollow. If you own an instant-read thermometer, the interior will register around 190°F when fully baked for enriched breads like these. Remove the rolls from the oven before they overbake to keep the crumb soft. Brushing with butter right after baking adds flavor and gives the tops a tender sheen, which helps maintain a pleasing texture.
Q: Can I make these rolls ahead for a party?
A: Absolutely. You can shape the rolls and place them in a greased baking dish, then cover and refrigerate them overnight. The cold proof will slow yeast activity and develop flavor. The next day, let them sit at room temperature for 30 to 45 minutes to take the chill off, then bake as directed, adding a few extra minutes if they feel cool. For larger gatherings, bake rolls earlier in the day and rewarm before serving; a 10-minute stint in a 300°F oven under foil prevents drying and brings back that just-baked warmth.
Q: What if my dough feels sticky or too dry?
A: Dough hydrate varies with flour and humidity. If the dough sticks excessively to your hands, sprinkle a bit more flour and continue to knead until the dough becomes tacky but not overly sticky. If it feels dry and resists coming together, add water or milk a teaspoon at a time until the dough hangs together. Knead consistently for the recommended time to develop gluten and achieve the right elasticity. Remember that slightly tacky dough yields softer rolls, so avoid adding too much flour during kneading.
Q: Can I switch the milk for a dairy-free option?
A: You can substitute unsweetened plant-based milk, such as soy or oat milk, warmed to the same lukewarm temperature. Keep in mind that the flavor and tenderness will shift slightly, and you might want to increase the fat content with a tablespoon of vegan butter or oil to mimic the richness dairy adds. The yeast will still activate with warmed plant milk, and the dough should rise similarly as long as you maintain the same temperature and proofing conditions.
Conclusion
For a reliable, crowd-pleasing roll that fills the house with bakery aroma, this honey butter dinner roll recipe earns a permanent spot in weeknight and holiday plans alike; if you want to compare technique or inspiration, this version pairs well with the methods shown in Tried & True Honey Butter Rolls – Sally’s Baking Addiction.





