
Two or three forks, sticky little fingers, and a platter that sparks a laugh that’s the kind of comfort food moment I live for. A colorful fruit bunny on the table says “we’re together” in a way that feels cozy and uncomplicated. It invites people to nibble, to chat, and to savor sweetness without fuss.
Family gatherings need easy wins. I make this fruit tray when grandparents visit, when kids come home from school, or when I want a spring-like centerpiece that disappears fast. The shape feels festive, the fruit keeps it light, and the whole thing comes together in minutes. You don’t need perfect knife skills or fancy ingredientsjust a little patience arranging pieces and a few toothpicks for anchoring. If you want another bright Easter dessert, my go-to cupcakes always get smiles, so I pair this tray with Easter Bunny Cupcakes at low-key holiday brunches.
At DishGrub we test simple ideas until they work for real life: quick cleanups, reliable crowd-pleasers, and versions that don’t require specialty tools. Our recipes focus on comfort and practicality so you can spend less time in the kitchen and more time enjoying the table. This fruit tray keeps that promiseminimal prep, maximum charm. I designed it for busy hosts who want something festive but fuss-free. It’s great for potlucks, classroom parties, and family breakfasts; it travels well, and kids love helping arrange the pieces.
Why you’ll love this dish
Why you’ll love this dish
This Easy Easter Bunny Fruit Tray blends playful presentation with healthy, familiar flavors. You get immediate visual impact without complicated baking or long prep. The tray works for picky eaters because you can pick and choose fruits they already like, and the bite-sized pieces make sharing effortless. The arrangement encourages grazing rather than formal plating, which keeps the mood relaxed and communal.
You can scale the design up or down depending on your guest list. Use larger melons and apples for adult gatherings, or smaller berries and grapes for a school party. The mix of texturessoft banana, juicy grapes, crisp apple, and tender berrieskeeps each bite interesting. The marshmallows add a touch of whimsy for kids, while adults appreciate the fresh fruit balance. Most importantly, you can assemble everything in under 20 minutes, which frees you to focus on people instead of presentation.
How to prepare Easy Easter Bunny Fruit Tray
How to prepare Easy Easter Bunny Fruit Tray
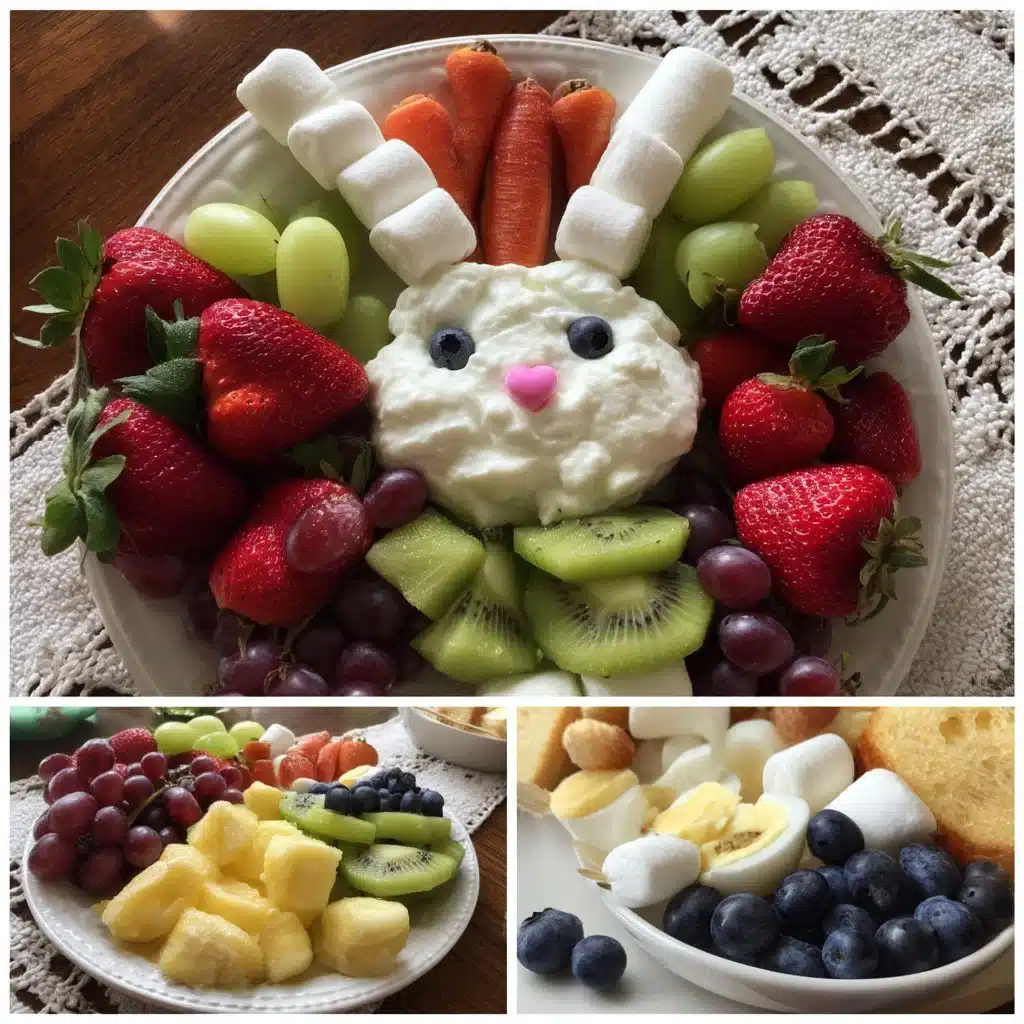
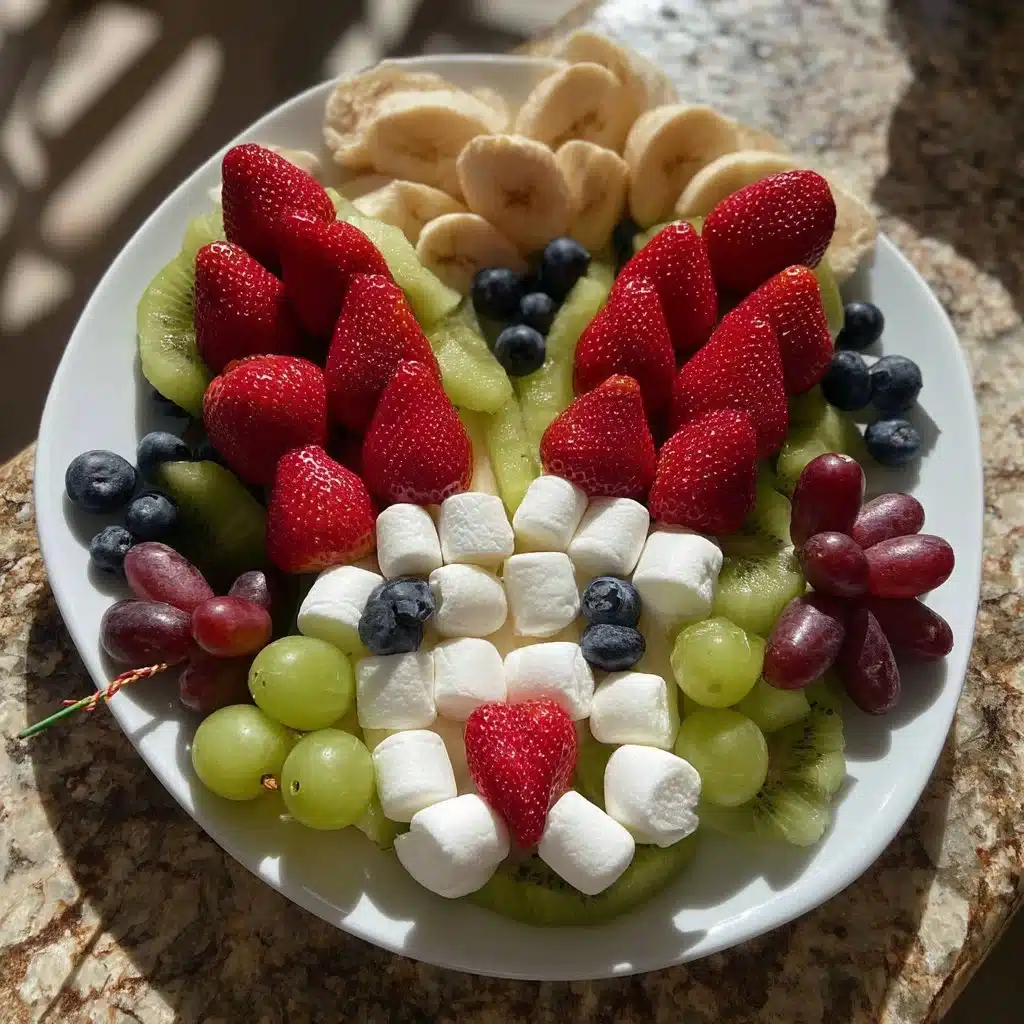
Think of the tray as a simple puzzle: start with the face, add ears, then build the body outward. Choose a shallow platter so the arrangement reads clearly and guests can reach pieces easily. Trim fruit into stable shapes: slice banana on the diagonal for thicker ears, cut kiwi or melon into rounds for a defined face, and group berries for eyes and accents.
If you want sturdier assembly, use toothpicks to anchor heavier pieces like melon or stacked marshmallows. Keep any perishable items chilled until you serve; fruit looks best and tastes freshest right off the platter. For a classroom or picnic version, consider packing fruit pieces separately and assembling the bunny on-site to avoid sogginess during transit.
Ingredients
- Assorted fresh fruits (e.g., strawberries, blueberries, banana, grapes)
- Marshmallows
- Grapes
- Kiwi
- Toothpicks
Instructions
- Arrange the assorted fruits on a large platter to create the shape of a bunny; place a round piece of melon or kiwi for the face and leave space for ears and body.
- Use slices of banana for the ears and blueberries for the eyes, positioning them carefully so the features look balanced.
- Use grapes or other fruits to form the body and feet, clustering them tightly so the shape reads clearly from across the table.
- Optionally, use marshmallows for decoration or as accents, securing them with toothpicks where needed, and serve immediately for a colorful and fun Easter treat.
Simple serving suggestions
Simple serving suggestions
Serve the tray as a light dessert, a brunch centerpiece, or a healthy snack at a family gathering. Add a small bowl of honey-yogurt dip or a vanilla whipped cream on the side for guests who want a sweeter bite. For adult gatherings, offer a citrus-honey drizzle in a small ramekin so people can spoon a little over fruit. Keep tongs nearby for a hygienic serving option at bigger parties, or arrange mini skewers for single-serve picks.
For a themed spread, pair the bunny tray with pastel napkins, a stack of small plates, and a pitcher of sparkling lemonade. If you host a kids’ craft table, let children decorate paper ears that match the fruit bunnythis keeps little hands busy while adults nibble. If you’d like more holiday dessert ideas in the same playful spirit, check out our fun takes on seasonal sweets like Easter Egg Brownies.
How to store it properly
How to store it properly
Once you assemble the tray, store it in the refrigerator until serving. Cover it lightly with plastic wrap or a cake dome to protect the fruit from absorbing fridge odors and to prevent the berries from drying out. If you expect leftovers, keep any wet or juicy fruitslike cut melon or sliced bananaseparate from drier components, then combine just before serving to maintain texture.
Leftover fruit keeps best in airtight containers in the fridge for up to 2 days. If the banana or kiwi begin to brown, toss those pieces or reserve them for smoothies instead of the next-day platter. For transport, assemble denser parts at home and add delicate berries and banana slices on-site.
DishGrub Kitchen Tips
DishGrub Kitchen Tips
Choose ripe but firm fruit to reduce mushiness when guests pick at the platter. If you use bananas, coat slices in a little lemon juice to slow browning. For a neat face, slice kiwi into even rounds and remove any large seeds that distract from the eyes. If you want a crisp edge on apple slices, keep them in cold water with a splash of lemon until assembly time.
Use toothpicks sparinglyonly when needed to anchor heavier piecesor place marshmallows on the tips to create soft accents that kids love. When you arrange grapes for the body, group them in clusters of three or more to create a fuller silhouette. Work from the center outward so you can adjust proportions as you go, and step back a few feet to check how the shape reads.
Make it your own
Make it your own
Swap fruits by season: apricots and peaches in summer, pears and pomegranate arils in early fall. Add texture with toasted coconut flakes, chopped nuts, or a sprinkle of chia seeds for a modern twist. For a chocolate-lover’s version, include a small dish of melted dark chocolate for dipping and drizzle a little over strawberries.
Turn the tray into characters beyond bunniesuse melon scoops and blackberries for a chick, or arrange oranges and grapes into a lamb. If you want a sugar-free kids’ treat, replace marshmallows with extra berries or thin slices of apple for decoration. For a party with dietary restrictions, label the platter with simple tags indicating nut-free and dairy-free options so guests can graze confidently.
Frequently asked questions
Frequently asked questions
Q: How long can I prepare the fruit bunny ahead of time?
A: You can prepare many of the components several hours ahead. Store sliced fruits like melons and kiwi in airtight containers in the refrigerator, and keep bananas aside until the last 15 minutes to avoid browning. Assemble the bunny no more than one hour before serving for best texture; this approach prevents fruit from weeping and keeps the arrangement looking fresh. If you must assemble earlier for travel, place wax or parchment paper between layers and chill thoroughly, then add delicate pieces like berries just before serving.
Q: What fruits work best for the face and ears?
A: Choose fruits with contrast and stability. Melon rounds or kiwi slices make a defined face because they hold their shape; bananas sliced on the diagonal create thick, sturdy ears. Use small, dark berries like blueberries for eyes because they provide a clear focal point. Grapes make excellent body pieces because they stay intact when handled. Avoid overly soft fruits, like very ripe peaches, for structural areas; reserve them for accents or bowls of extra fruit.
Q: How can I adapt this for food allergies or special diets?
A: This tray adapts easily. Skip marshmallows for a vegan or gelatin-free option and use extra fruit or roasted chickpeas for texture. For nut-free gatherings, avoid adding any chopped nuts and clearly label the platter. If guests avoid sugar, offer plain Greek yogurt or a mashed banana-honey dip instead of chocolate or sugary sauces. For low-FODMAP or other specific diets, choose compliant fruits and communicate ingredients to guests so they can make safe choices.
Conclusion
For a step-by-step visual and another maker’s approach to the same idea, see Cooking With Janica’s Easter Bunny Fruit Tray for extra inspiration and plating tips.





